

The Sony WH-1000XM4 headphones are celebrated for their premium sound quality, adaptive noise cancellation, and comfortable design. To fully enjoy these features, it’s essential to pair them with your laptop effectively. This comprehensive guide will walk you through the entire process, from setting up the headphones to troubleshooting common issues.
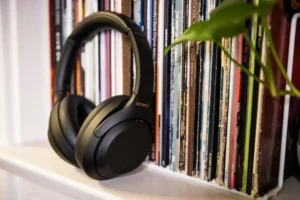
Sony WH-1000XM4 Headphones
The Sony WH-1000XM4 is a flagship model in Sony’s line of wireless noise-canceling headphones. Known for its industry-leading noise cancellation, superior sound quality, and smart features like adaptive sound control and voice assistant compatibility, the WH-1000XM4 offers an unparalleled audio experience. To get the most out of these headphones, connecting them to your laptop via Bluetooth is essential.
Preparing Your Headphones for Pairing
Before pairing your Sony WH-1000XM4 headphones with your laptop, ensure they are correctly prepared:
Charge Your Headphones
Make sure your headphones are fully charged. A low battery might hinder the pairing process or lead to connectivity issues. Connect your headphones to a power source using the provided USB-C cable and wait until the charging indicator shows a full charge.
Turn On the Headphones
Press and hold the power button on the left earcup of the headphones. You should see the indicator light turn on. Keep holding the power button for about 7 seconds until you hear a voice prompt saying, “Bluetooth pairing,” and the indicator light starts flashing quickly. This signals that your headphones are now in pairing mode.
Enabling Bluetooth on Your Laptop
To pair your Sony WH-1000XM4 headphones with your laptop, you need to ensure that Bluetooth is enabled on your laptop:
On Windows Laptops
Access Bluetooth Settings: Click on the Start menu, then select Settings. Navigate to Devices and click on Bluetooth & other devices.
Turn On Bluetooth: Toggle the switch to turn on Bluetooth if it’s not already enabled. The system will start searching for available devices.
On macOS Laptops
Open Bluetooth Settings: Click on the Apple menu, then select System Preferences. Click on Bluetooth to open the Bluetooth settings menu.
Enable Bluetooth: Ensure Bluetooth is turned on. If it’s off, click the Turn Bluetooth On button.
Pairing the Headphones with Windows Laptops
Once Bluetooth is enabled on your laptop, you can proceed to pair your headphones:
Add a Bluetooth Device: In the Bluetooth settings menu, click on Add Bluetooth or other device.
Select Bluetooth: Choose Bluetooth from the list of options.
Choose Your Headphones: Your laptop will search for available devices. Find and select WH-1000XM4 from the list.
Complete the Pairing: Follow any additional on-screen instructions to complete the pairing process. You should see a notification indicating that your headphones are connected.
Pairing the Headphones with macOS Laptops
For macOS users, the pairing process is slightly different:
Locate Your Headphones: In the Bluetooth settings menu, your laptop will scan for available devices. Look for WH-1000XM4 in the list.
Pair the Device: Click on Connect next to your headphones. Your Mac will complete the pairing process and display a confirmation message when the connection is successful.
Testing the Connection
After pairing, it’s crucial to test the connection to ensure everything is working correctly:
Play Audio: Start playing audio from your laptop to check if the sound is coming through the headphones. Adjust the volume on both the laptop and the headphones as needed.
Check Bluetooth Settings: Confirm that the WH-1000XM4 is selected as the audio output device. On Windows, you can find this setting in the Sound settings menu. On macOS, check the Sound settings in System Preferences.
Troubleshooting Common Issues
If you encounter issues while pairing your headphones, consider the following troubleshooting steps:
Ensure Bluetooth is Enabled
Confirm that Bluetooth is turned on both on your laptop and your headphones. Sometimes, Bluetooth might be disabled inadvertently.
Restart Devices
Restart both your laptop and headphones. This can resolve temporary connectivity issues and help reset the Bluetooth connection.
Update Bluetooth Drivers
Ensure that your laptop’s Bluetooth drivers are up to date. Outdated drivers can cause compatibility issues. You can update drivers through the Device Manager on Windows or check for macOS updates via the Software Update section in System Preferences.
Reset Your Headphones
If problems persist, you might need to reset your headphones. To do this, press and hold the power button and the custom button (or the noise canceling button) for about 7 seconds until you see the indicator light flash. Refer to the user manual for specific instructions on resetting your WH-1000XM4 headphones.
Maintaining and Optimizing Your Headphones

To ensure optimal performance and longevity of your Sony WH-1000XM4 headphones:
Regularly Update Firmware: Check for firmware updates through the Sony Headphones Connect app to get the latest features and improvements.
Clean Your Headphones: Wipe the earcups and headband with a soft, dry cloth to keep them clean. Avoid using abrasive cleaners or immersing the headphones in water.
Store Properly: When not in use, store your headphones in their case to protect them from damage and dust.
Pairing your Sony WH-1000XM4 headphones with your laptop is a simple process that enhances your audio experience. By following this guide, you can enjoy high-quality sound and advanced noise-canceling features whether you’re working, streaming content, or enjoying music. If you encounter any issues, the troubleshooting tips provided should help resolve common problems. Enjoy the superior audio experience that the WH-1000XM4 has to offer!