The touchpad is an essential component of your Lenovo laptop, allowing you to navigate your system efficiently without the need for an external mouse. However, if your touchpad is not working, it might have been accidentally disabled or affected by system settings. This detailed guide will walk you through various methods to enable the touchpad on your Lenovo laptop.
Checking Touchpad Function Keys

Understanding Function Keys
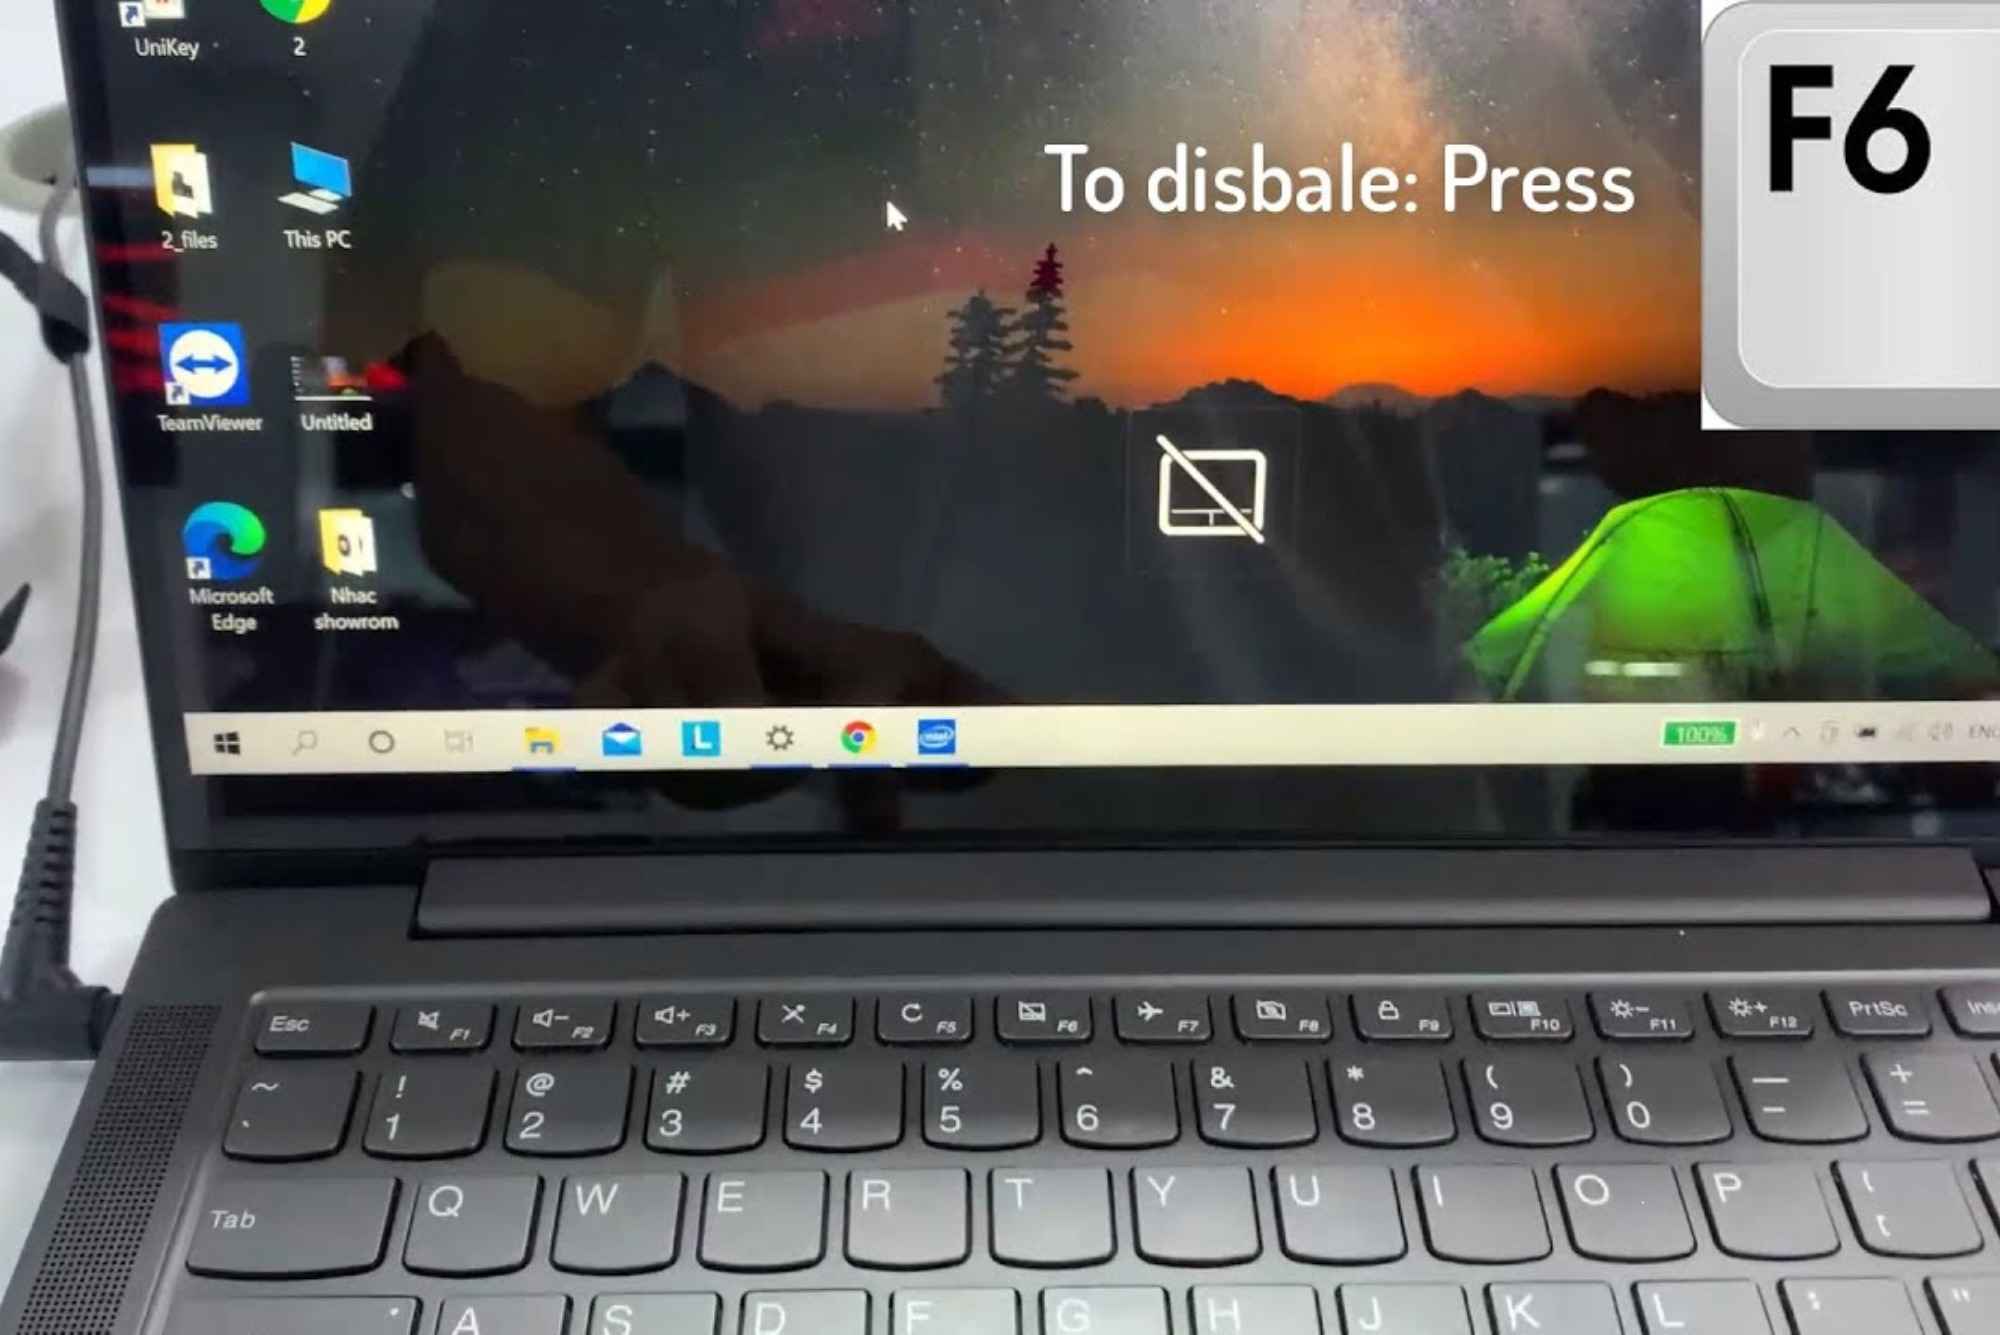
Many Lenovo laptops come equipped with function keys that can enable or disable the touchpad. These keys typically feature an icon resembling a touchpad or a finger pointing at a touchpad. Commonly, these keys are found among the F1-F12 keys on your keyboard.
Steps to Enable the Touchpad Using Function Keys
Locate the Function Key: Identify the key with a touchpad icon. On many Lenovo models, this could be F6, F8, or F9. The icon might look like a small rectangle with two lines or dots representing a touchpad.
Press the Function Key: Hold down the Fn key, usually located in the lower-left corner of your keyboard. While holding the Fn key, press the function key with the touchpad icon.
Check Touchpad Functionality: After pressing the key combination, the touchpad should be enabled. Test it by moving your fingers across the touchpad to see if the cursor responds.
Enabling the Touchpad Through Windows Settings
Accessing Windows Settings
If the function keys don’t resolve the issue, you can enable the touchpad through the Windows Settings menu.
Open Settings: Press Windows + I to open the Settings app. Alternatively, you can click on the Start menu and select the gear icon to open Settings.
Navigate to Devices: In the Settings window, click on Devices, which will take you to the devices and peripherals management area.
Select Touchpad: On the left-hand side menu, select Touchpad. If you don’t see the Touchpad option, your laptop may not have a touchpad driver installed or recognized.
Enable the Touchpad: Make sure the touchpad toggle is set to On. If it is already on, you might try toggling it off and then on again to refresh its status.
Additional Touchpad Settings
In the touchpad settings menu, you can adjust sensitivity, enable or disable gestures, and customize other touchpad features. Ensure that all relevant options are configured according to your preferences.
Updating or Reinstalling Touchpad Drivers

Why Update Drivers?
Outdated or corrupt drivers can cause touchpad malfunctions. Updating or reinstalling the drivers often resolves these issues.
Open Device Manager: Press Windows + X and select Device Manager from the menu.
Locate Touchpad Drivers: Expand the Mice and other pointing devices section. Find the touchpad driver, which may be listed under names like ELAN, Synaptics, or Windows Precision.
Update Driver: Right-click on the touchpad device and select Update driver. Choose Search automatically for updated driver software. Windows will search for and install any available updates.
Reinstall Driver: If updating does not work, right-click on the touchpad device again and select Uninstall device. Restart your laptop, and Windows should automatically reinstall the driver upon reboot.
Using Manufacturer’s Website
For more specific drivers, visit the Lenovo support website, enter your laptop model, and download the latest touchpad drivers available.
Using Lenovo Vantage or Control Panel
Lenovo Vantage
Lenovo Vantage is a utility for managing your Lenovo laptop’s settings and drivers.
Open Lenovo Vantage: Search for Lenovo Vantage in the Start menu and open it. If you don’t have it installed, download it from the Microsoft Store.
Navigate to Device Settings: Within Lenovo Vantage, go to Device or Input.
Enable the Touchpad: Ensure that the touchpad is enabled. You can also adjust settings such as sensitivity and gesture controls.
Control Panel Method
Open Control Panel: Press Windows + R, type control, and press Enter to open the Control Panel.
Go to Mouse Settings: Click on Hardware and Sound, then Mouse.
Find Touchpad Settings: Depending on your touchpad model, you may find a tab labeled Device Settings, ELAN, or Synaptics. Ensure the touchpad is enabled within this tab.
Checking BIOS Settings
Accessing BIOS
In rare cases, the touchpad may be disabled in the BIOS, which is the firmware interface for your laptop.
Enter BIOS Setup: Restart your laptop. During the boot process, press F1, F2, Delete, or Esc (depending on your model) to enter BIOS setup.
Navigate to Touchpad Settings: Use the arrow keys to navigate to the Advanced or Integrated Peripherals tab.
Enable the Touchpad: Look for touchpad settings and ensure it is enabled. Save and exit the BIOS.
What to Do if BIOS Changes Don’t Help
If enabling the touchpad in BIOS does not resolve the issue, you may need to contact Lenovo support for further assistance or consider that there might be a hardware problem.
Troubleshooting Common Issues
Touchpad Not Responding
Check for Physical Damage: Ensure that there is no visible damage to the touchpad.
Check for Software Conflicts: Sometimes, third-party software can interfere with touchpad functionality. Try booting in Safe Mode to see if the touchpad works.
Touchpad Gesture Not Working
Update Touchpad Software: Ensure you have the latest touchpad software installed.
Adjust Gesture Settings: In the touchpad settings menu, ensure that multi-touch gestures are enabled.
Enabling the touchpad on your Lenovo laptop can be done through several methods, including function keys, Windows Settings, driver updates, Lenovo Vantage, and BIOS configuration. If the touchpad remains unresponsive despite these steps, it may be time to seek professional help. Regular maintenance and keeping your drivers up-to-date can prevent future issues with your touchpad. By following this comprehensive guide, you should be able to restore touchpad functionality and enhance your computing experience.


